

How to Deploy Django with Uvicorn (ASGI) on Windows IIS


Django is a high-level web framework written in Python that encourages rapid development and clean pragmatic design. It's designed to help developers build web applications quickly and efficiently by providing a robust set of tools, libraries, and functionalities.
In my previous blog, I have shared on how to deploy Django application on Windows IIS. While the previous method focuses on deploying the application using WSGI (Web Server Gateway Interface), this method allows any Django application to run on Windows Server or Windows environment. However, today we would delve into using ASGI (Asynchronous Server Gateway Interface), a successor of WSGI.
But what are WSGI and ASGI? The difference between them and the usage behind it.
Let's find out!
Strolling into web application, Web Server Gateway Interface (WSGI) and Asynchronous Server Gateway Interface (ASGI) play a crucial role acting like a middle person, managing requests that come from the client (Web, other PC, server, mobile). According to Philip J. Eby, WSGI was originally defined as PEP333 in 2010. While WSGI provides a synchronous Python web application, however, the performance was not picking up. Hence, this is how we got ASGI in 2019 as the successor.
Living up to its name, ASGI would enable you to handle requests asynchronously. This gradually increase processing speed as your computer no longer need to undergo sequential processing.
Take a look at the table below to see the differences:
| Web Server Gateway Interface | Asynchronous Server Gateway Interface | |
| Concurrency Model | Synchronous | Asynchronous |
| Handling Asynchronous Ops | Sequential processing | Supports asynchronous operation. |
| Use Cases | Traditional Web Application | Real-time Application like Chat and Streaming |
| Compatibility | Widely adopted and mature | Emerging and increasing adoption |
Now I will demonstrate on how you can deploy Django application by using Uvicorn (ASGI) on Windows IIS.
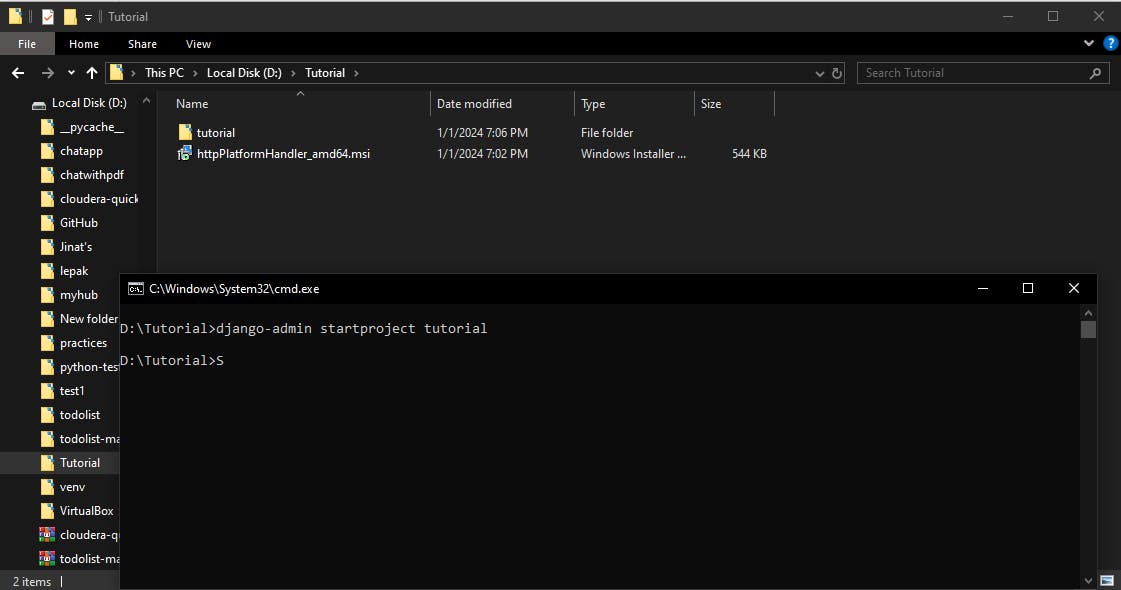
Install Django and start a new project.
Create a virtual environment -
python -m venv venv.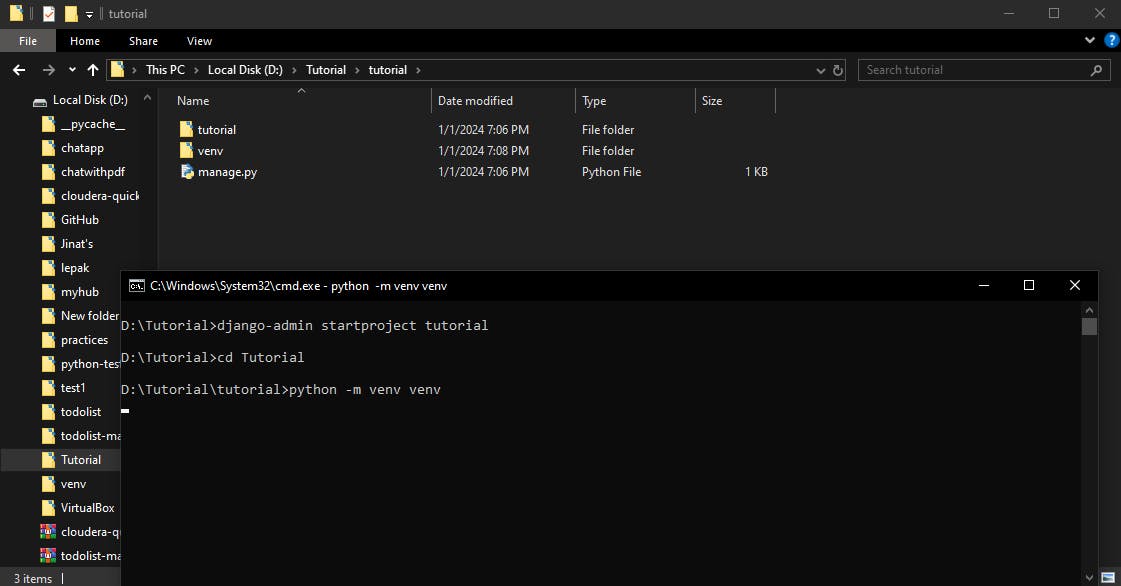
Open command prompt in the directory where the
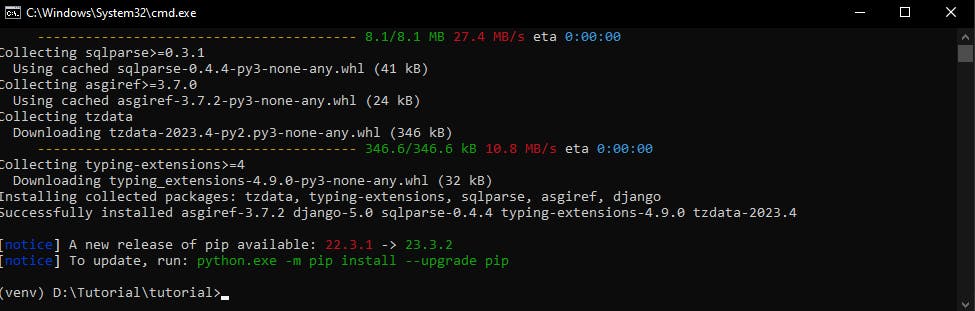
venvfolder is and enter.\venv\Scripts\activateto activate the virtual environment andpip install django,pip install uvicornandpip install wfastcgi.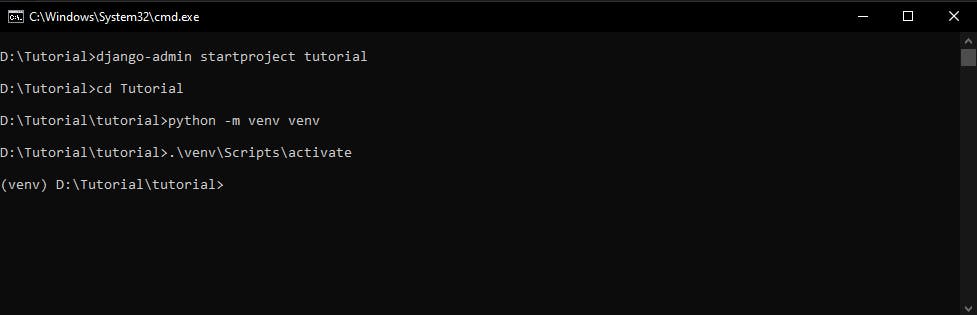
Set
ALLOWED_HOSTto all by adding'*'in settings.py.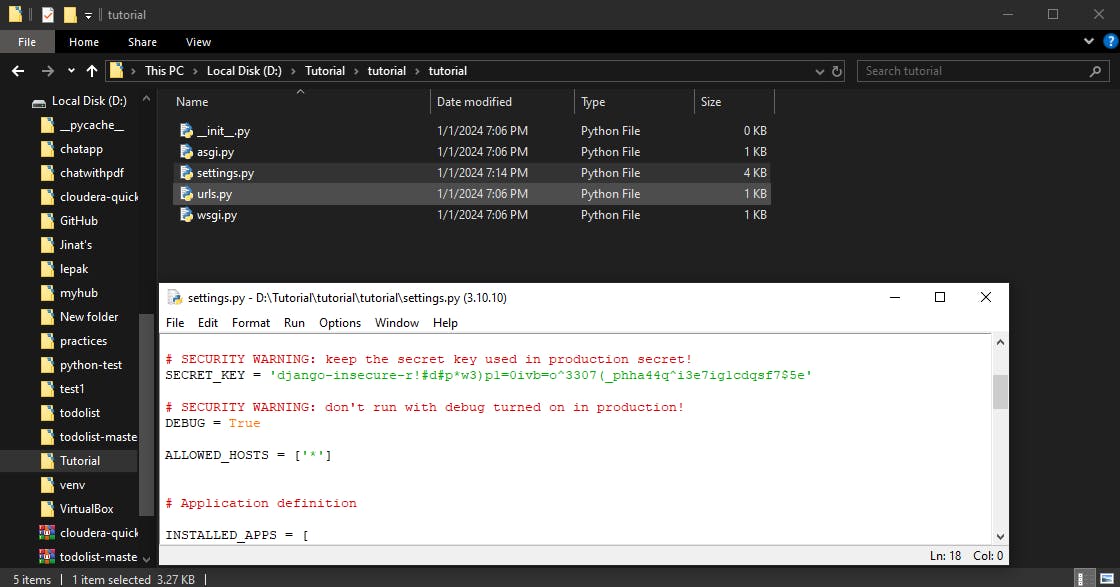
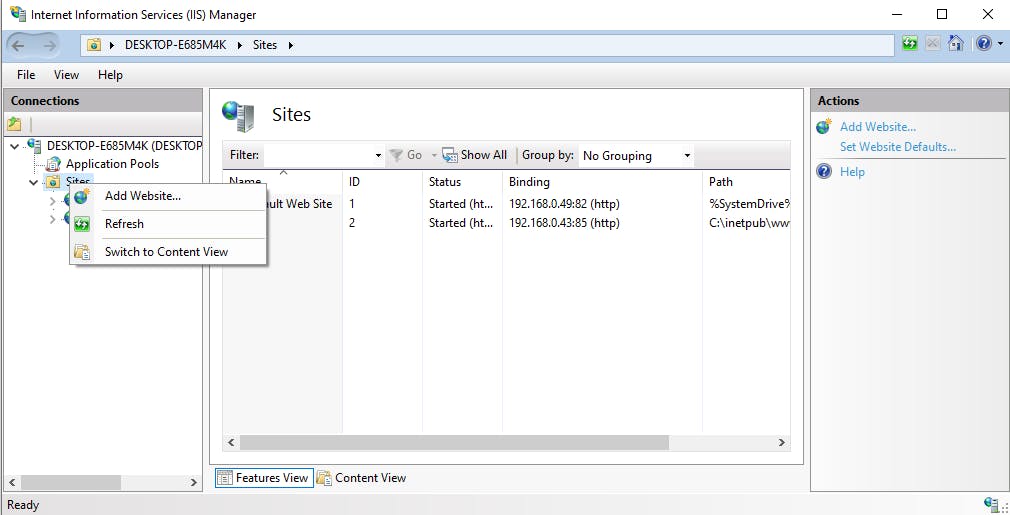
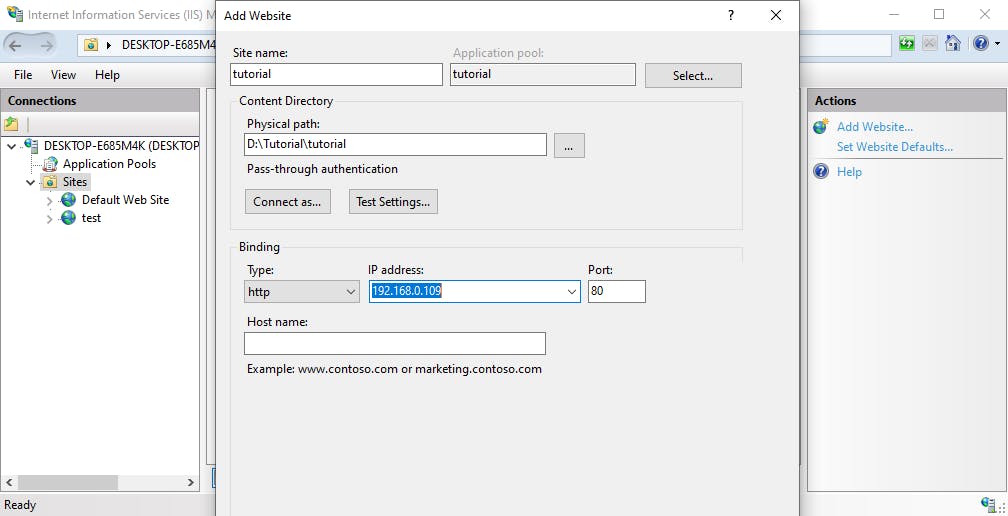
Open Windows IIS and create a new site with the Django project as physical directory and remember the application pool name because you will need it to for security access to the folder later.
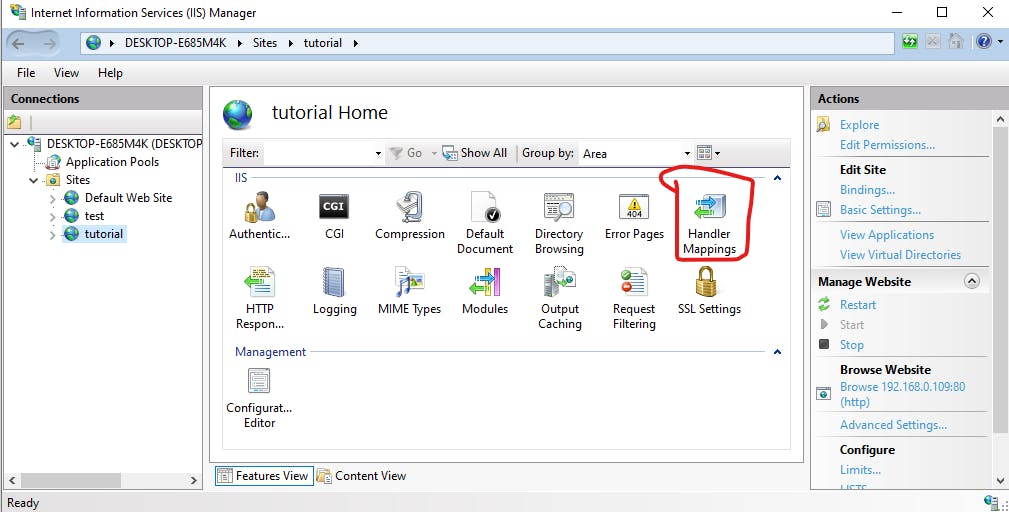
Download and install
HTTP Platform Handlerfrom here.Set a module mapping in handler mapping of the site.
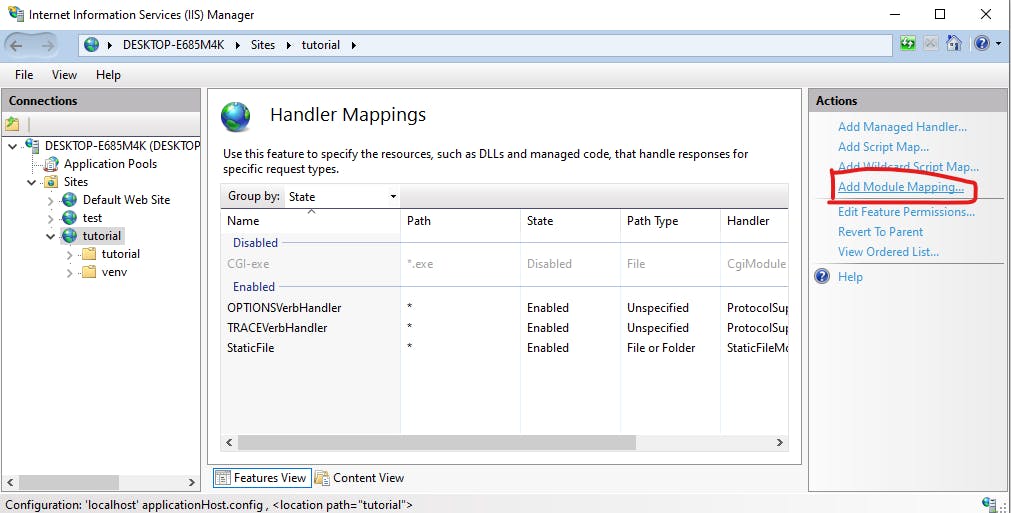
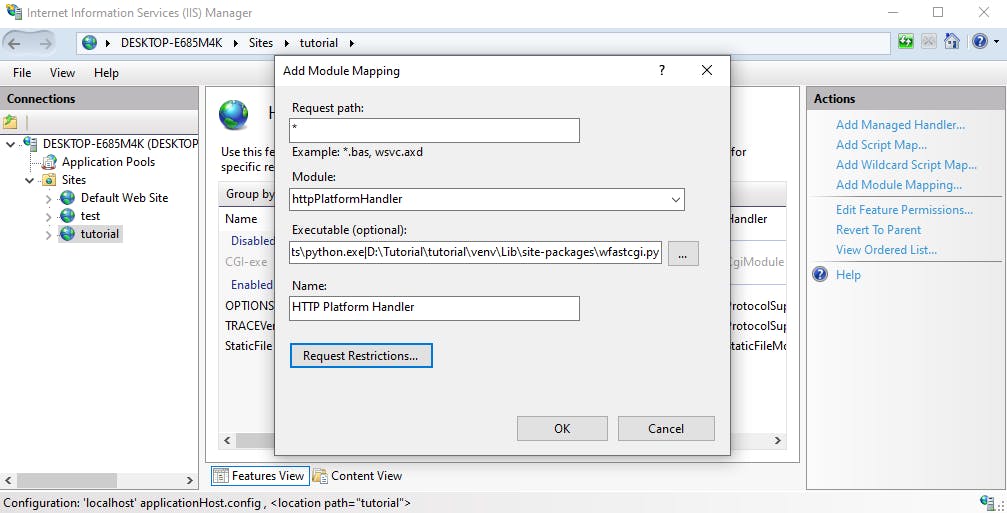
Request path: *
Module: httpPlatformHandler
Executable(optional):
[Python venv path]|[wfastcgi.py path], for example:D:\Tutorial\tutorial\venv\Scripts\python.exe|D:\Tutorial\tutorial\venv\Lib\site-packages\wfastcgi.py
Name: HTTP Platform Handler
Click onRequest Restrictions...button and untickInvoke handler only if request is mapped to: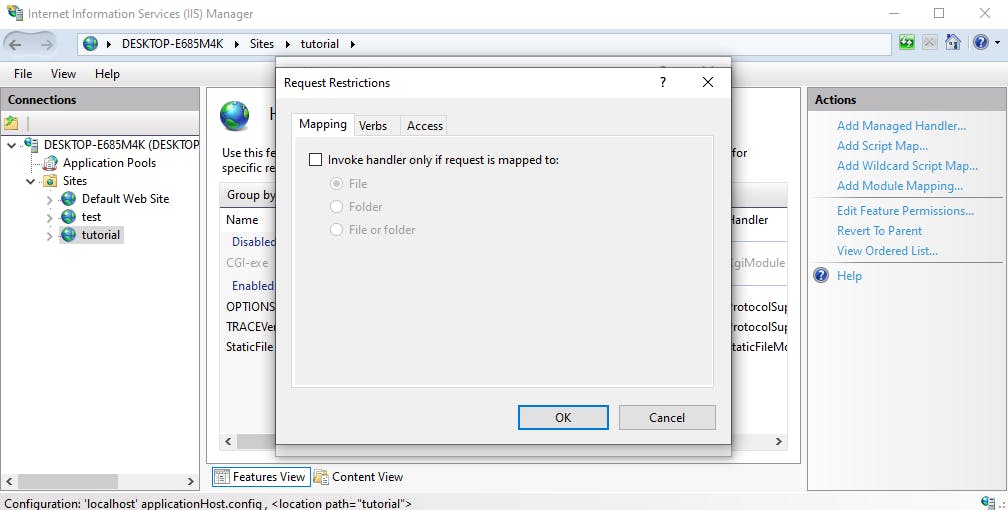
Click OK.
If you encounter an error that says '|' character is invalid. Remove this line
|D:\Tutorial\tutorial\venv\Lib\site-packages\wfastcgi.py. And create aweb.configfile in the project directory.
And copy the same scripts listed below and replace with
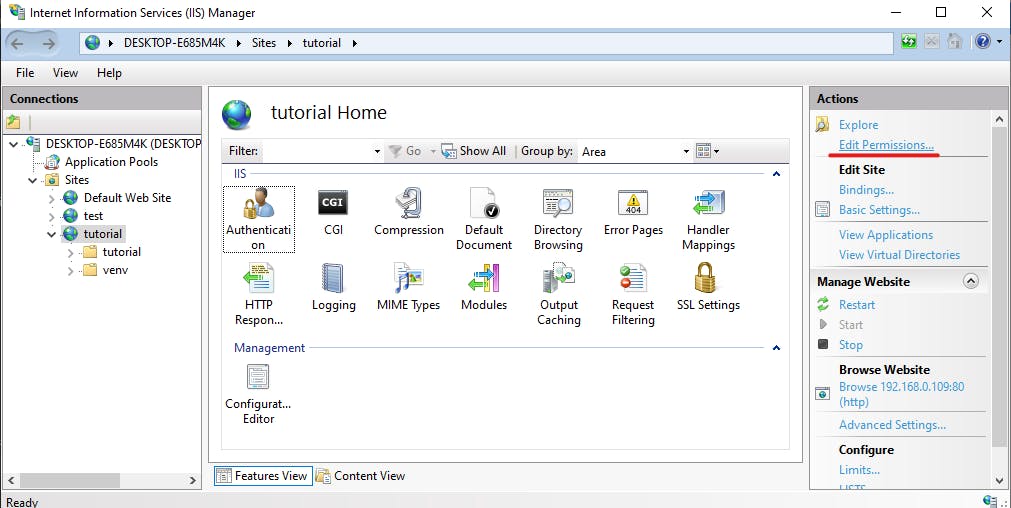
web.configcontent:<?xml version="1.0" encoding="UTF-8"?> <configuration> <appSettings> <add key="WSGI_HANDLER" value="tutorial.asgi.application" /> </appSettings> <system.webServer> <handlers> <add name="HTTP Platform Handler" path="*" verb="*" modules="httpPlatformHandler" resourceType="Unspecified" /> </handlers> <httpPlatform requestTimeout="00:05:00" startupTimeLimit="120" startupRetryCount="3" stdoutLogEnabled="true" stdoutLogFile=".\logs\python-stdout" processPath="D:\Tutorial\tutorial\venv\Scripts\python.exe" arguments="-m uvicorn tutorial.asgi:application --port %HTTP_PLATFORM_PORT% --host 0.0.0.0"> <environmentVariables> <environmentVariable name="PORT" value="%HTTP_PLATFORM_PORT%" /> </environmentVariables> </httpPlatform> </system.webServer> </configuration>This step is mandatory for IIS to access the web application. Click on Edit Permission in Windows IIS.
Click on Add button.
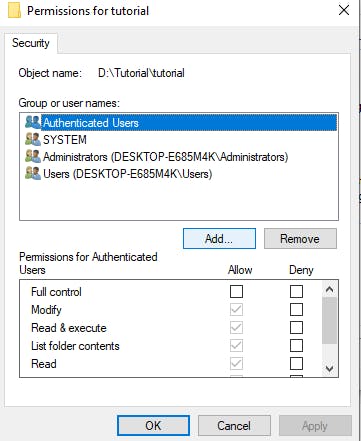
Key in the application pool name and click on
Check Namesto ensure IIS can find the application pool. And click OK.
Tick the checkbox for Write and click Apply and OK.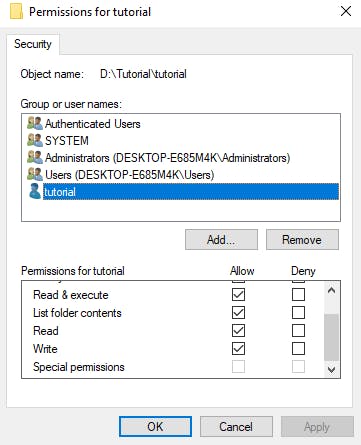
Navigate to python.exe folder in the computer/server and right click on the folder and repeat Step 8.
Modify
web.configin the project folder.<add key="WSGI_HANDLER" value="[your project name].asgi.application" />processPath="[your python.exe in venv folder path]"arguments="-m uvicorn [your project name].asgi:application --port %HTTP_PLATFORM_PORT% --host 0.0.0.0"Congratulations! You may now browse into the asynchronous web application.
References:
i. HTTP Platform Handler for IIS
ii. Stackoverflow - Hypercorn/Uvicorn for Python App on Windows IIS
iii. The differences between WSGI and ASGI
iv. Python ASGI on IIS
v. WSGI vs ASGI
vi. FastCGI Wikipedia
Share with me what are you building on my Linkedin.(it is not a must but please)